Following is a complete list of materials required to build the Learn to Draw exhibit. Each section will call out the materials used in that area.
| Qty | Description | Vendor | Part # |
|---|---|---|---|
| 1.00 | 3/4" Premium White Birch Plywood | Dakota Hardwoods | pw32503905 |
| 0.25 | Clear Acrylic 1/4" x 4' x 8' | Regal Plastics | 220x48x96 |
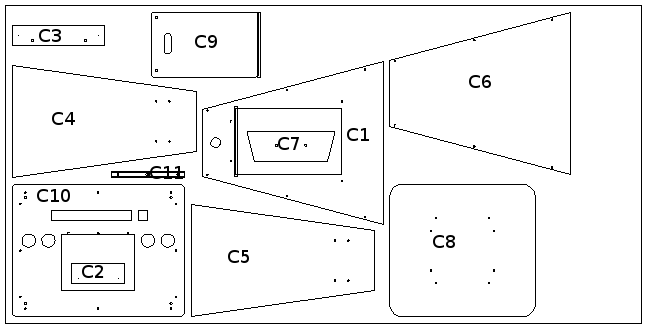
All of the stock is intended to be cut on a Shopbot CNC Router. The files are available Here. Each file was programmed with x-axis and y-axis 0 being the very corner of the stock. The z-axis 0 should be the top of the material. The filenames first number indicates the sequence they should be run, and the second number is the bit that should be used. Also programmed thickness of each stock is labeled below, you may need to cheat the z axis to adjust for your material. Here are the sequences for each piece of stock.
| Qty | Description | Vendor | Part # |
|---|---|---|---|
| 1.00 | Learn to Draw Artwork - 1/4" acrylic - back print decal | Fast Signs | - |
| 1.00 | Sol Formica 48"x96" | Dakota Hardwoods | 3209 |
| 0.01 | Minwax 1-Quart Fast-Drying Semi-Gloss Polyurethane | Lowes | 45871 |
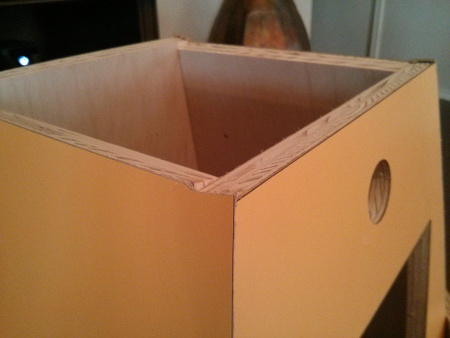
All holes in the following section will need to be countersunk. Attach C2 and C3 to C1 by lining up the pilot holes. Then attach C4 and C5 to C1 while keeping the bottom flush as shown in the image below
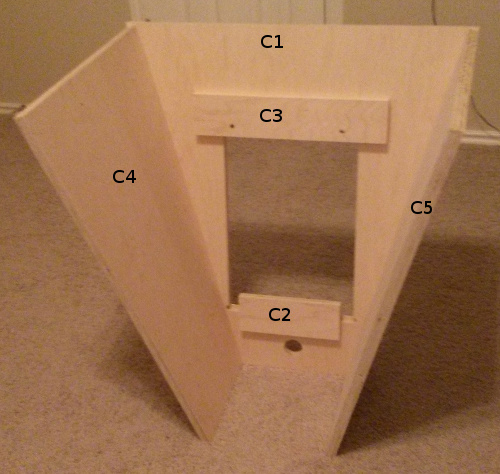
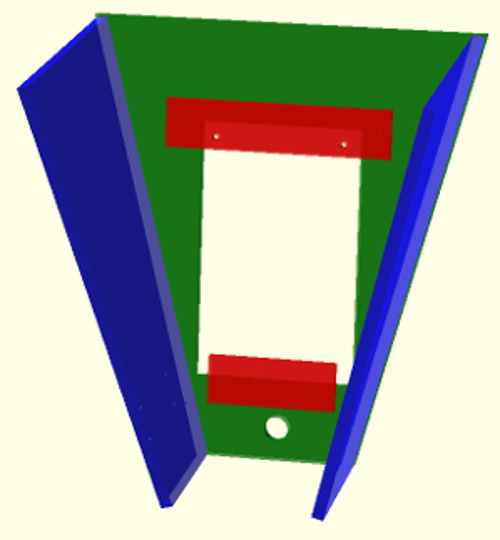
Attach C6 to the assembly, again making sure it is flush to the bottom edges. Place C7 inside the cabinet, but don't fasten it.
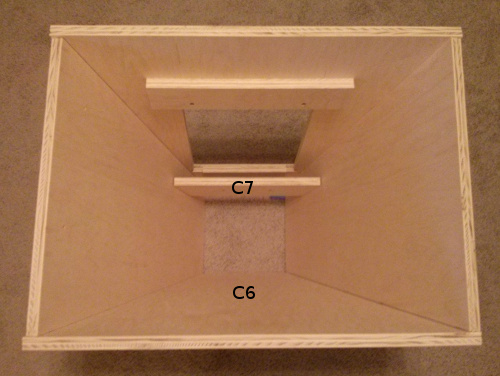
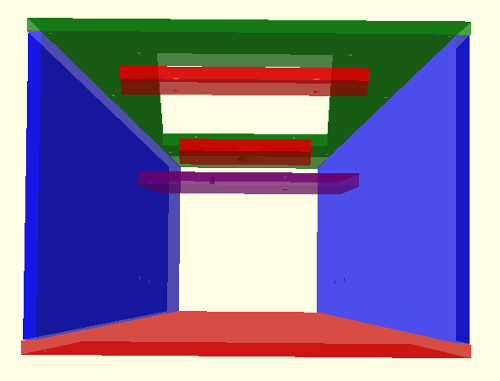
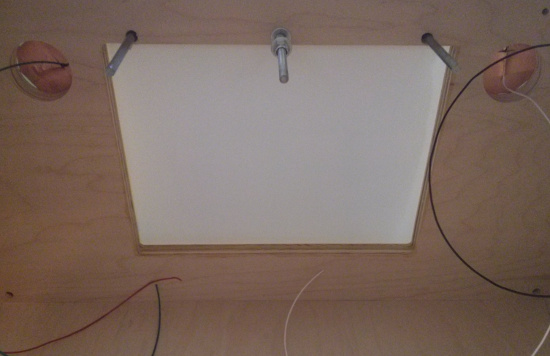
We need to test that the projector can be properly aligned. Attach the projector to C7 with a 1 1/4" long 1/4-20 bolt and power it up. Then place C10 and the printed artwork on top and align, so it's centered. Make sure that the image centers in the white area of the printed artwork. It is OK to have a little bit of the image outside the white area, but the center does need to be in the center. Once C7 is well aligned, you can put screws into it through C4 and C5.
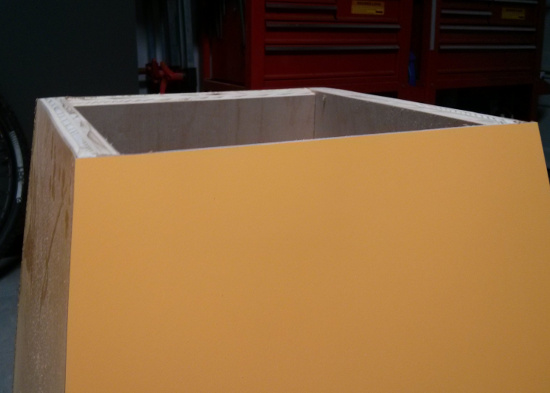
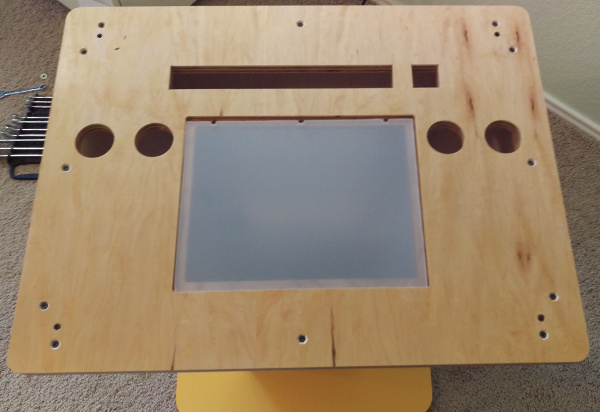
Now we need to laminate the cabinet body, C9, and C8. The top and bottom edges will look pretty rough like the picture below.
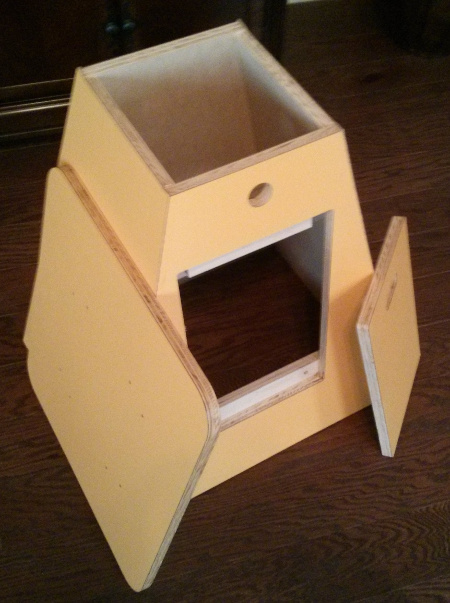
Take a power belt sander and try to flatten the top and bottom edges until they are flush with the ground. Make sure you are careful to always grind the laminate into the plywood to prevent peeling. And it's a good idea to pull out a level and check that we are staying square with gravity.
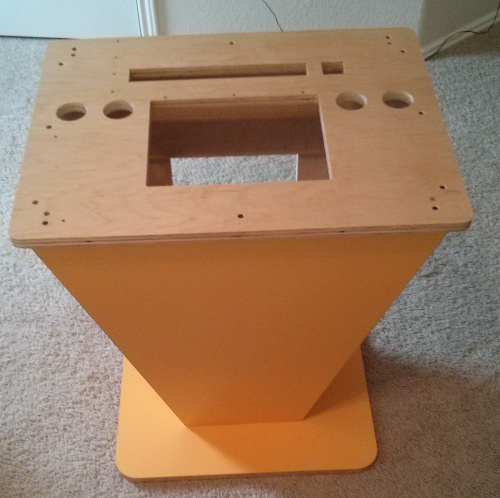
Apply two coats of polyurethane to the C10 and C11, also apply to the edges to C8. Once those are dry, attach C8 and C10 to the rest main cabinet body.
| Qty | Description | Vendor | Part # |
|---|---|---|---|
| 1.00 | Precision Needle-Tip Squeeze Bottle 27 Gauge Needle | McMaster-Carr | 1902T67 |
| 0.10 | Scigrip #4 Acrylic Adhesive | McMaster-Carr | 7517A1 |
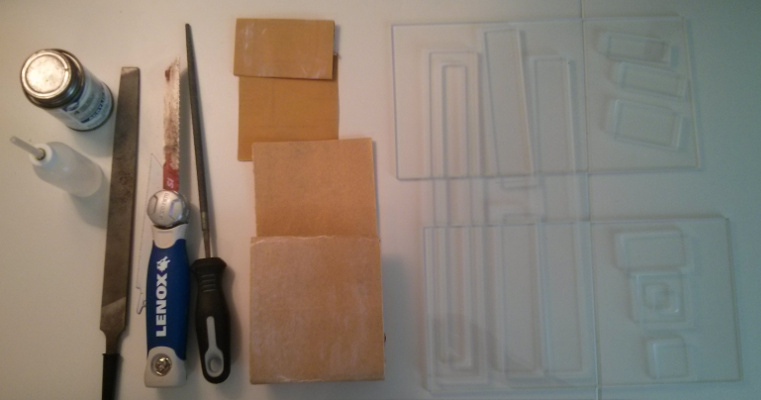
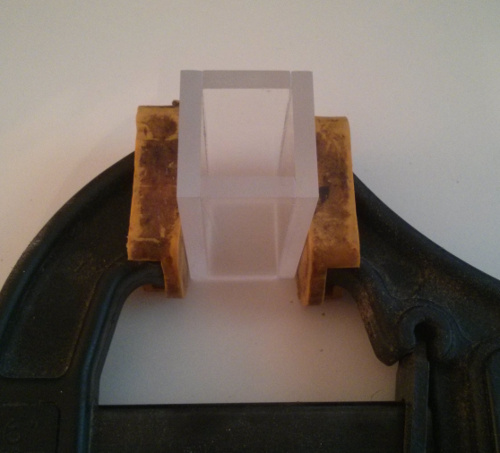
If you've worked with acrylic before you can skip this paragraph. To assemble acrylic you need to finely finish all the cut edges. I cut the tabs using a open hacksaw then use a file to grind them flat. Sand with 220 grit then follow up with 320 grit to get cloudy edges like shown in the picture below. If you would like a glass like finish you can continue sanding up to 500 grit and then flame polish the edges. Once the pieces are ready, you clamp them together tightly and drip some welding solvent liquid into the joints, it should get sucked all the way through the joint. If you have access to a laser cutter, the parts turn out way nicer if cut on the laser cutter.
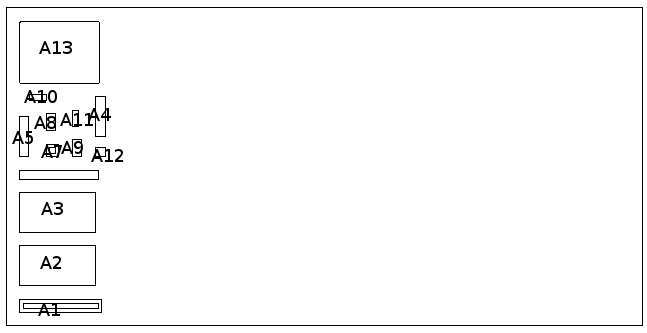
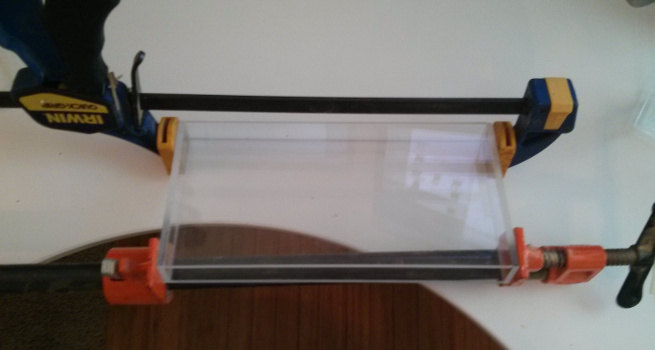
Take A2, A3, A4, and A5 and clamp together as in the image below. Usually you can only tack the parts together with the clamps, so wait until it dries, remove the clamps and then finish gluing. It may also be neccessary to reflatten the top and bottom once it is glued together, so the following steps go smoothly.
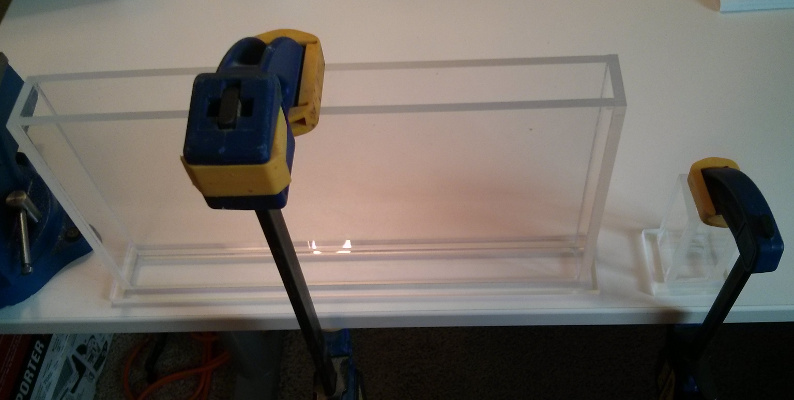
Take A8, A9, A10, and A11 and clamp together as in the image below and glue them. It may also be neccessary to reflatten the top and bottom once it is glued together, so the following steps go smoothly.
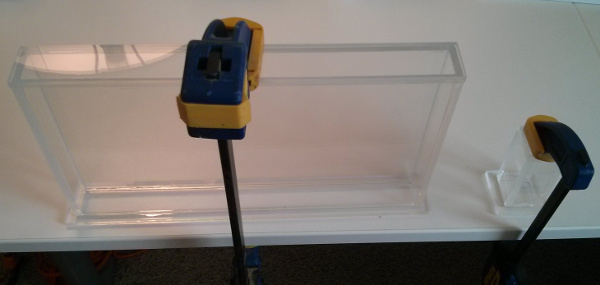
Take A1 and the larger acrylic assembly then clamp them together and glue them. Then do the same with the smaller assembly and A7.
Now attach A6 to the larger assembly and A12 to the smaller assembly.
| Qty | Description | Vendor | Part # |
|---|---|---|---|
| 1.00 | Zotac Intel Core i3-3120M 2.5GHz HM76 4GB DDR3 500GB HDD with Wi-Fi A&V&GbE Mini PC Barebo | Amazon | ZBOX-ID91-PLUS-U |
First step is to install Ubuntu. First download Ubuntu 14.04 LTS at here. Then you need to write the ISO out to a USB key using this process. Then boot up into the USB key and select "Install Ubuntu". Follow the setup guide presented but when you get to the user section, name the user "learn_to_draw" with the password "learn_to_draw" and select the automatic logon at startup option. Please do not select a different password or username, they are not really used for security and recovering them is quite difficult. Also make sure you connect to the internet and get all updates during installation.
Once the computer starts click the ubuntu logo in the top left corner and type "Brightness & Lock" and select the control panel by that name. Inside this control panel, make sure the "Dim screen" option is unchecked. The "Turn screen off when" option should be put to "Never". The "Lock" option should be set to "OFF", and finally the "Require my password when waking" option should be unchecked. Then you can close the control panel.
Click on the ubuntu launcher in the top left corner and type "Software & Updates". Once the control panel is open then click on the "Updates" tab. Inside the updates tab change the "Automatically check for updates:" field to "Never".
Now open a terminal by clicking on the launcher icon and typing "Terminal". Once open type the following command "sudo apt-get install python-serial git git-gui" It will prompt you for your password and then ask if you are sure, type "y". Once that operation is complete type "sudo apt-get install python-pygame". Now let's pull down the software. On the command line type "git clone https://[your username]@bitbucket.org/messelman/learn_to_draw.git ./learn_to_draw", note that the your username needs to be replaced by your own username. Once that is complete write the following command on the terminal "sudo adduser learn_to_draw dialout". The last thing we need to do in the terminal is set up for a nightly reboot. In the terminal type "sudo crontab -e", it will ask for your password which should be "speaker". Then it will bring you into an editor, if it asks for you to select an editor select "nano". At the bottom of the file add the following line:
We need to adjust the screen resolution to 1025x768 for the target application to work correctly. Click on the Ubuntu logo in the top left corner of the screen and type "Displays". Open the Displays control panel and set the resolution to 1025x768 and click Apply. If you were doing the PC setup while connected to a standard monitor, you may have to shutdown and restart with the projector connected in order to select this resolution.
Now we're going to set up the auto-start feature for the software. Click the Ubuntu logo in the top left and type "Startup Applications" and enter the control panel. Now click the add button and type the name "learn_to_draw" then browse for the command. The command should be "/home/learn_to_draw/learn_to_draw/launch_main.py". Finally click the "Add" button and close the control panel. Now reboot the computer by clicking on the gear icon in the top right corner of the computer.
| Qty | Description | Vendor | Part # |
|---|---|---|---|
| 1.00 | Arduino Uno - R3 | Sparkfun | DEV-11021 |
| 1.00 | Enclosure for pcDuino/Arduino - Clear | Sparkfun | PRT-11797 |
| 1.00 | Breadboard - Mini Modular (Blue) | Sparkfun | PRT-12045 |
| 1.00 | Sparkfun Capacitive Touch Sensor Breakout | Sparkfun | SEN-09695 |
| 0.10 | Hook-Up Wire - Assortment (Solid Core, 22 AWG) | Sparkfun | PRT-11367 |
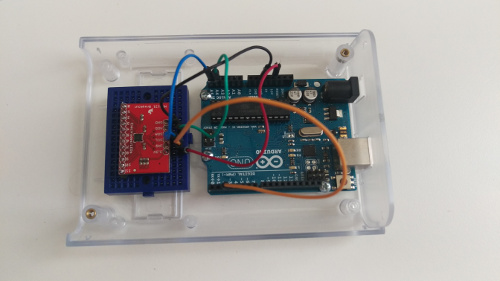
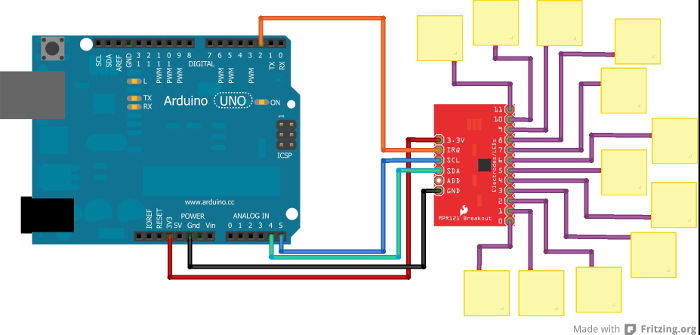
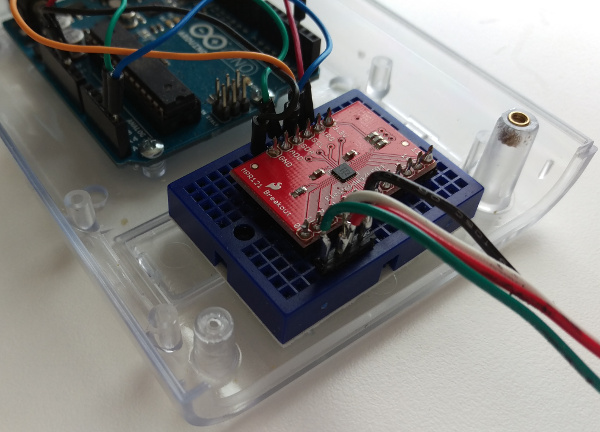
First screw the Arduino into the bottom of the Arduino case. Then attach the adhesive breadboard to the case next to the Arduino. Cut male to male headers and solder to the bottom of the MPR121 breakout. Push the MPR121 breakout board into the breadboard and finally attach the jumper wires as shown in the images below.
Take 4 pins of a male to male header and push into the breadboard on electrodes 0 - 3. Cut 1' lengths of green, red, white and black wires and solder them onto the header in that order.
First you'll need to download the Arduino Software suite here. Once you have the software downloaded and installed you need to download the arduino code here. Create a folder in your sketchbook named "touchable_speaker" and copy the arduino software files into that folder. Once you have the program and the library installed, you can launch the arduino software and open the "touchable_speaker" sketch in your sketchbook. Then connect the arduino to your computer via USB cable and click the "Upload" button in the arduino IDE. If no errors are reported then the arduino is complete.
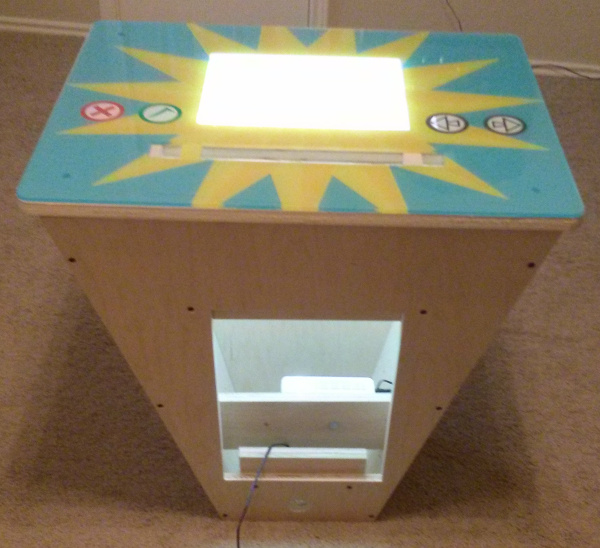
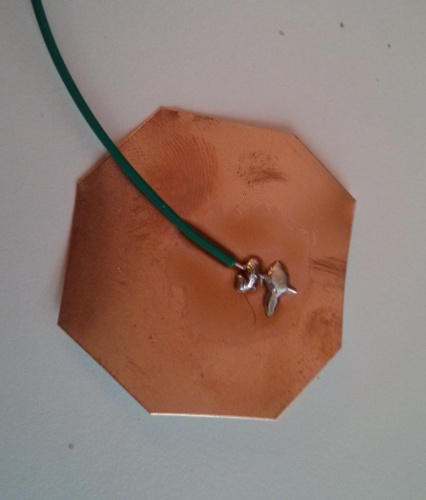
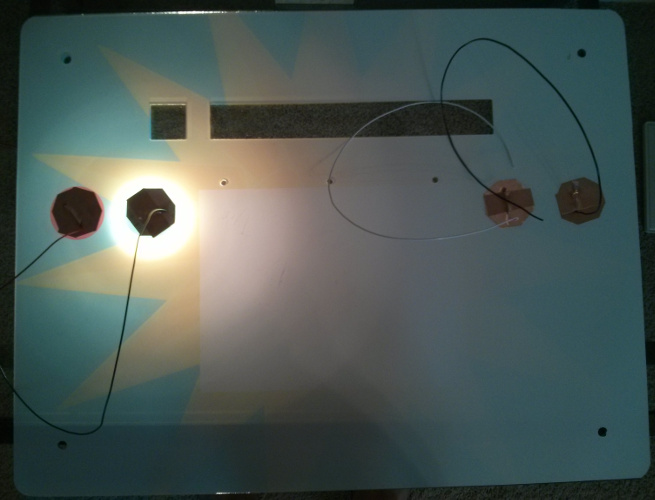
Have a sign company print this file. In that file the white rectangle in the center should be 100% transparent, and the material should be 1/8" acrylic with the image on the backside. The calibration marks are to help align it when cutting it out using this file. Once you have the artwork cut, flip it over and you may need to place it on a glass table or against a window, so you can see through it somewhat. Cut out a 2" octagon of copper tape, apply copper flux, and crank up the soldering iron to high. Attach 24" of wire to the copper octagon with the pigtail hanging off the center. Once soldered then place another small piece of copper tape over the wire to help with strain relief. Do this for all 4 buttons on the top of the artwork, color coding is suggested to help with later connections. (Green is checkmark, red is x, white is right arrow, and black is left button). Make sure you do the soldering off the artwork, once it soldered then remove the adhesive backing and apply to artwork.
Apply privacy film as directed over A13. Then place the acrylic on the worktop in the pocket with the film facing up.
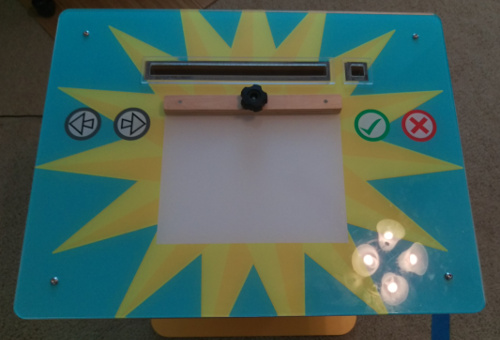
Then screw in 4 1/4-20 inserts into the worktop and mount the artwork. Place the acrylic paper holder and pencil cup into the holes in the top. Double check that the exposed corners of the acrylic pieces are not too sharp.
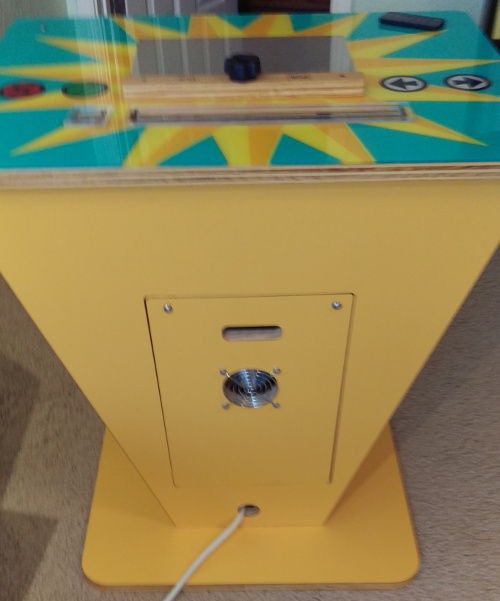
Take the fan screen and place over the fan hole. Mark the position of the 4 mount holes and drill them out with a 3/16" bit. Mount the fan (blowing out) and it's screen with 3" #8-32 bolts with washers and nuts. Finally screw in two 1/4-20 inserts into the two holes in C3. Put the door (C9) in place and secure with two bolts
Use woodfiller and sandpaper to make C11 look very nice, almost all of this will be visible. Then give it two coats of polyurethane, making sure to sand with 320 grit in between. Cut 2 4.5" lengths of the 1/4" smooth rod and hammer into the two outer holes. Then take a hot glue gun and fix the rods in place underneath the paper holder in the track.
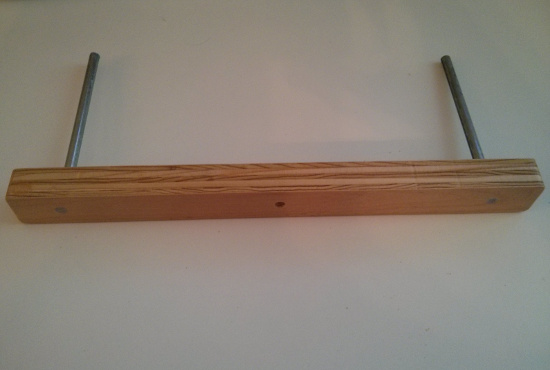

Cut 5.5" of 1/4-20 threaded rod and screw down a nylon lock nut 7/8" down on the shaft. Now put the rod through the back of C11 and screw down the knob with some loctite. Neither the knob nor the shaft should spin when done.

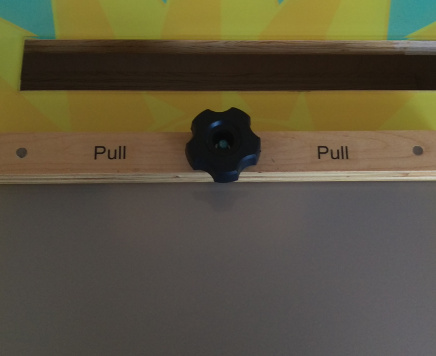
Now slide the whole assembly through the three holes just above the white rectangle on the artwork. From underneath put a washer, a spring, and another washer on the threaded knob. Then put a nylon lock nut onto the threaded shaft and tighten until the tension on the paper holder is adequate. Take this tempate file and print it on the clear decals to make the "Pull" instructions. Cut the decal up with a scicors and apply to paper clip.
Use plumbers strap to mount the arduino case in the front right corner. The goal in this step is to make the wire runs as short as possible and as far apart from each other as possible. Once the arduino is mounted trim and join the wires between the buttons and the arduino. If in later steps, the buttons are unresponsive or are getting ghost touches then this is the step that will need to be redone.
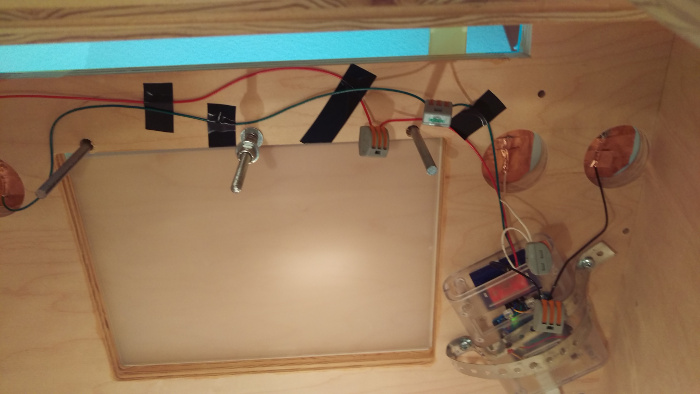
Now we can run wires and mount the rest of the components.
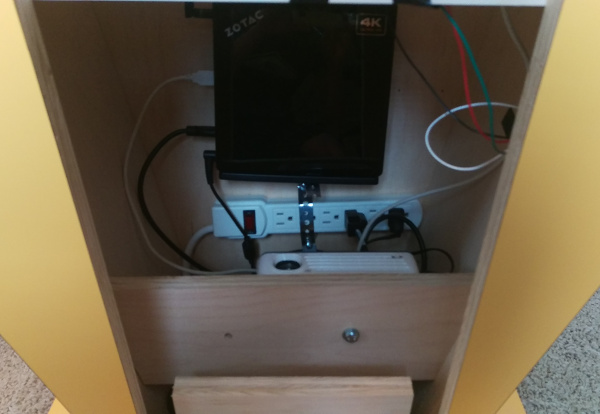
The projector by default will have the image mirrored in our setup. Startup the projector and use the remote to go to the menu. In the menu go to Projection and click OK. Now select "Invert Behind" and click OK again. Finally you'll need to make sure the projector source is set to HDMI using the top right button the remote.
The buttons have a sensitivity threshold that needs to be adjusted depending on where it is installed. If the sensitivity threshold is too low then the exhibit will get phantom button presses. If the sensitivity threshold is too high then the users will have difficulty pressing buttons. When the exhibit is up and the software is running press a key from 0-9 and then wait 30 seconds. Zero is the most sensitive and 9 is the least sensitive. I've found that 4 works best for me in most applications.